I’ve been playing with these keyboards for almost my whole life. My brother had an SK-5 when we were growing up. Somehow it came into my possession during my teen years, and helped fuel some super lofi experiments in industrial music and sound collage. Later, when I started circuit bending, it became a sacrificial project. Eventually, in some forgotten transaction, we parted company. Presumably in a desperate effort to raise funds to pay bills during my tumultuous early 30s.
A few years ago, I acquired and bent an SK-1, which appeared prominently on the Subetherean album “A Thought Experiment About the Fall of Civilization”. But, I never really liked how it turned out. I keep trying the classic patch bay approach to bending the SK series keyboards, and keep not liking the results. That might have been part of the decision making that went into picking this up a few months back. That, and it was selling for a third of the cost of an SK-1, or an SK-5, with essentially the same functionality of an SK-5.
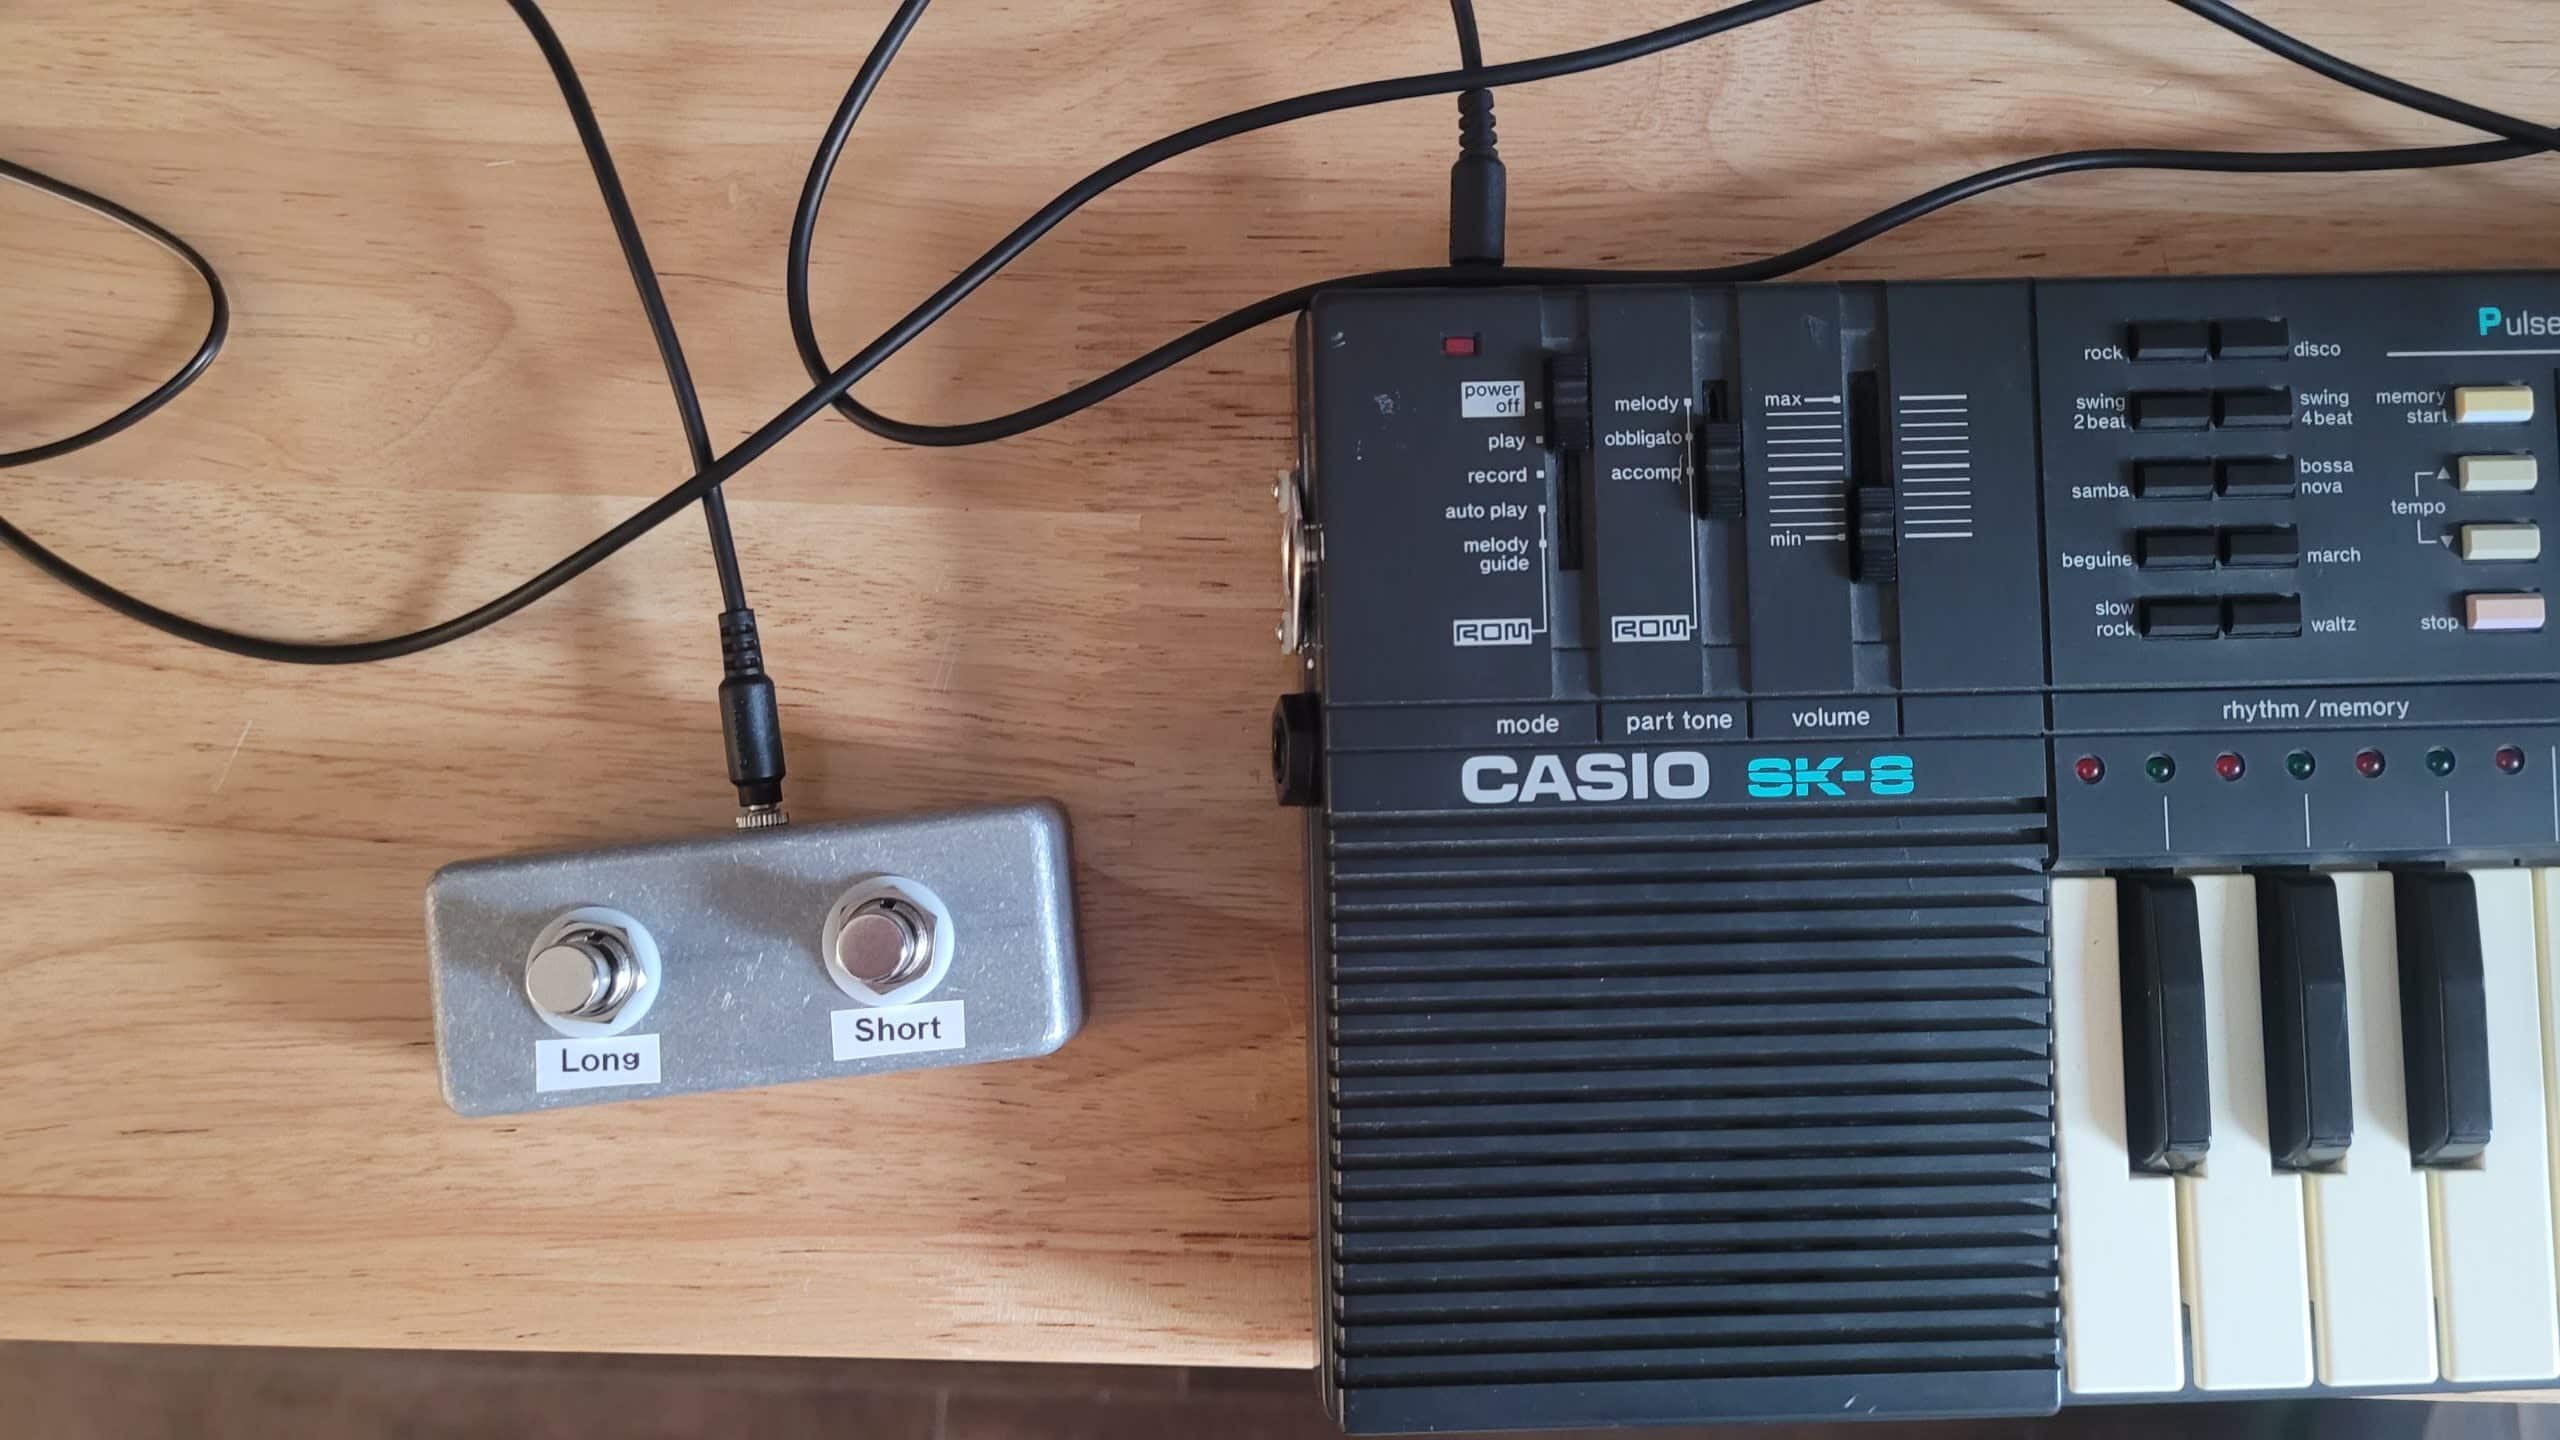
It sat in the corner of my studio where all my “Some Day” projects live until recently when, while working on a new music project, I convinced myself that I needed an old lofi sampler. My first inclination was to start searching Reverb and eBay, then I remembered this little cutie collecting dust. With the very specific remit of using this as a sampler, I went into these modifications with some key goals in mind: I need MIDI. I need standard audio output. I need hands-free sampling.
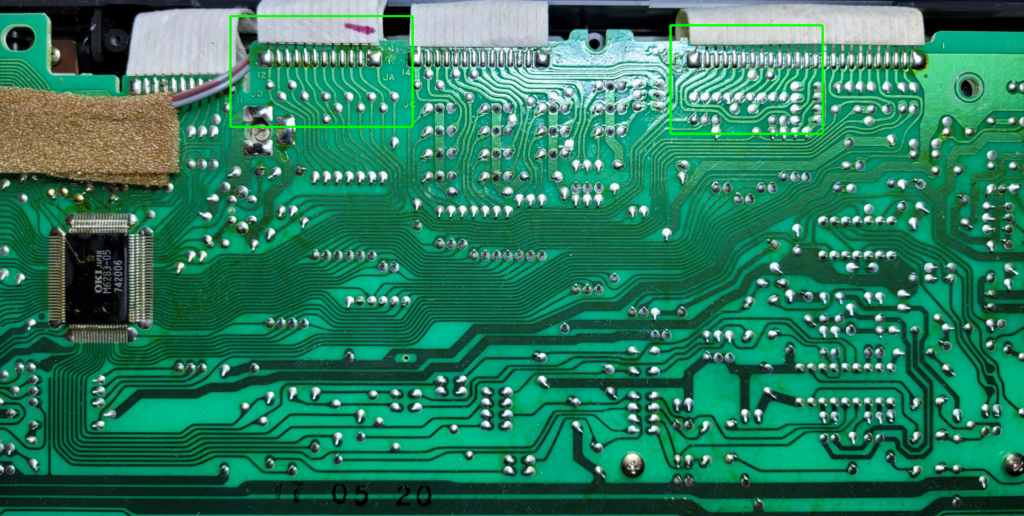
SK-8 circuit board, for reference. Green box on the left is the ribbon cable for the keys (MIDI). Green box on the right is the ribbon cable for the front panel buttons (Sample record).
MIDI
For MIDI, I went with the tried-and-true Universal Midi Retrofit previously developed by Highly Liquid. There’s some guy in Lithuania still producing and selling these on eBay. I’ve bought a few and so far they’ve all worked like a charm. If you’re not familiar with the UMR, I have some documentation that I’ve nicked from the Wayback Machine for posterity. The User Manual describes the installation and setup process. The SK-1 document is screencaptured from a forum thread, and covers the specific instructions for the SK series keyboards
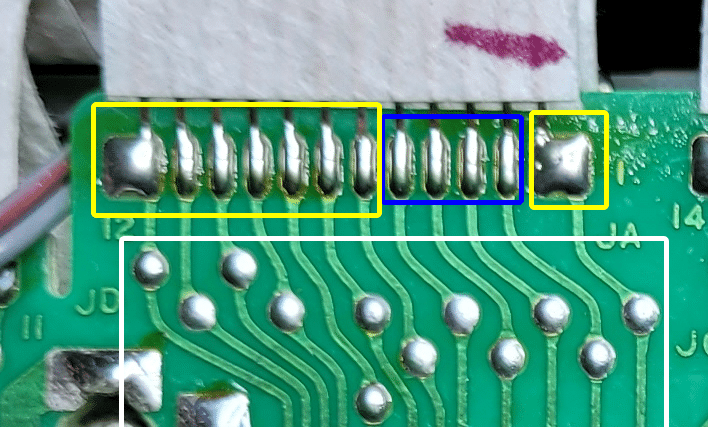
The pinout for the SK-8 is the same as the SK-1. The select and data lines from the keyboard matrix connect to the main PCB through this ribbon cable. Blue box, represents the data lines. Yellow boxes are the select lines. Those ribbon cables can be really finnicky to work with, so I chose to follow the traces down to the spots highlighted in the white box and attach my wires to those.
Points are numbered from right-to-left, just like the diagram in the SK-1 document. Like the SK-1, it has active high key triggering, so the polarity should be set to the plus sign (+). There are a number of places on the board where you can tap into +5V and ground. I wired my to the voltage regulator, but I don’t think that was the best place for it. It’s still powered up when the switch is off, which means the switch is somewhere after the regulator. If I ever crack this open again, I’ll trace down a better place to tap into the power supply.
Audio Output
This is personal preference and not at all necessary. I really don’t need a studio keyboard with a built-in speaker. And I don’t want to deal with adapting the 3.5mm headphone jack for a standard 1/4″ instrument cable. So, killing two birds with one stone, I removed the speaker and replaced it with a 1/4″ jack. Keeping it simple, I desoldered the speaker leads from the PCB and soldered in new leads connected to the new jack. I put a 1k resistor in series on the “positive” terminal. This is way higher than the 8 or so Ohms impedance from the speaker, and might be overkill, but I didn’t want to output too hot.
Hands-free Sampling
Up to this point, I’ve just been following along with standard modifications. I’ve done the speaker replacement mod on dozens of projects. The UMR instructions for the SK keyboards are well vetted. However, something that I’ve never seen is a way to trigger the sampler, without pressing the key
Since I want to use this in the studio as a sampler, and I don’t have three hands, I needed a way that I could push the Sample button while doing something else–like, playing guitar or percussion. Fortunately, I found an old TableHooters page with a detailed pin description for all the ICs on the board.
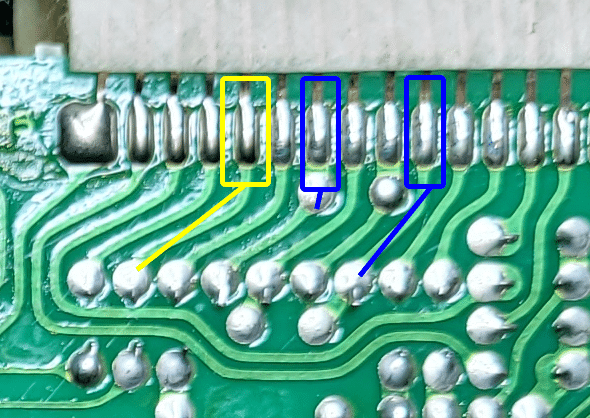
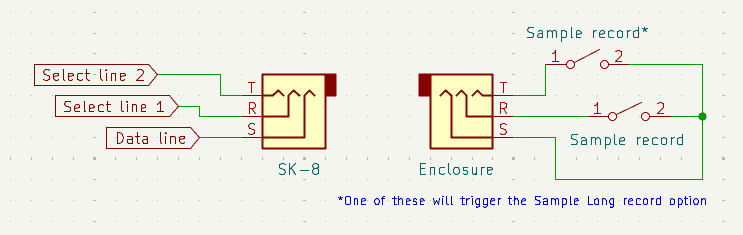
In the image above, the yellow box is the data line for the sample record buttons. The blue boxes are the select lines. From there, it’s as simple as wiring a switch that connects the blue box to the yellow. Or… Build a breakout box to use as a foot switch. For this, I used two stereo 3.5mm jacks, two momentary foot switches (normally open) and a rugged aluminum enclosure.

The stereo 3.5mm jacks will have three terminals: one for the tip, one for the ring and one for the sleeve. Each of these terminals should be wired to one of the boxes in the image above. It doesn’t really matter which box is wired to which terminal. It is very important, though, that you remember which terminal is which… To make it easier for myself, I wired the yellow box to the sleeve terminal, and the blue boxes to the tip and ring terminals.
However you approach it, just make sure both jacks are wired the same.
In the enclosure, the wire for the data line (yellow box), needs to connect to both switches. Then each switch gets one wire for a select line (blue boxes).
Some momentary switches will have three terminals, and can be wired as either “normally open” or “normally closed”. This indicates how the switch will behave. A normally open switch is normally “off”, until you push it. A normally closed switch is normally “on”, until you push it. For this project, you want to make sure you’re wiring for a normally open switch.
Future Considerations
There’s a reasonably good chance that I will eventually give this the proper circuit bending treatment. It has the same chipset as the SK-5 and SK-1, so all of the standard bending options still apply. I think this will largely depend on whether or not it turns out to be useful as a sampler.
Leave a Reply